Add your first piece
Grab any finished piece, set it on the table, and tap +. One photo is enough to save it; the app can measure it, write the title, description and tags, and suggest a price. Everything stays editable afterwards, so nothing here has to be perfect the first time.
-
STEP 1Tap +
The + button sits at the bottom right of Inventory (on a new account a “Your first piece” cue points at it). The first time, the app asks for the camera: tap Enable Camera.
-
STEP 2Photograph it, or pick photos you already took
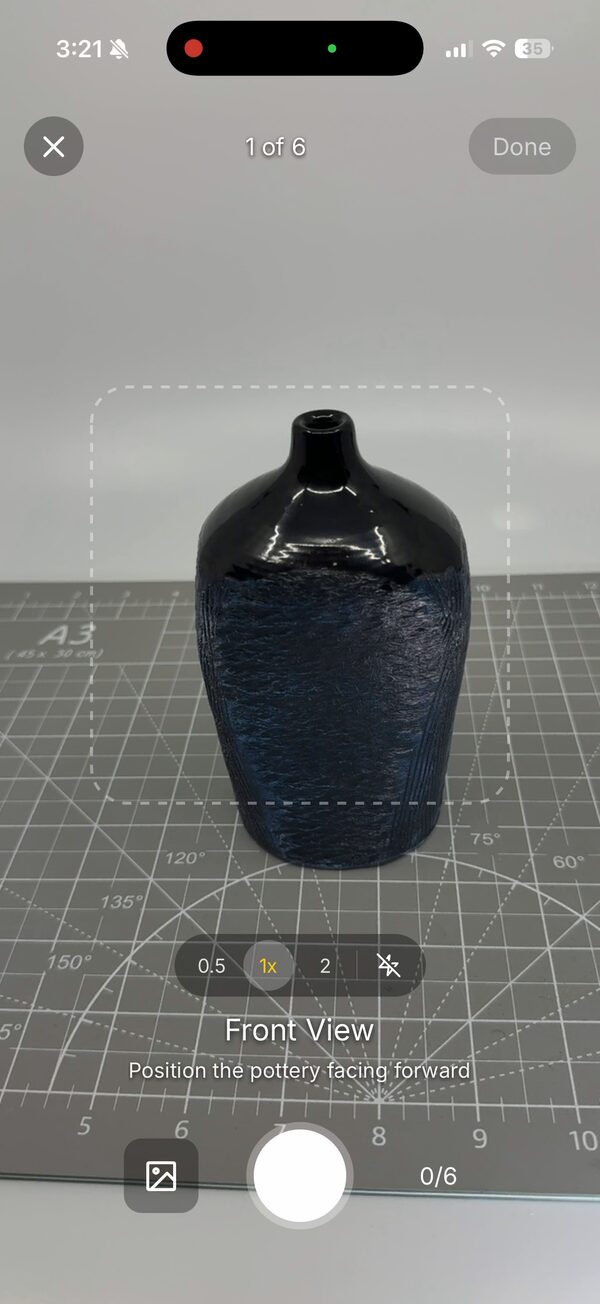
The camera walks you through the angles — Front View first, with a frame to line the piece up in and a line of instruction under it. Take the ones you want and tap Done: one photo is enough to save, and more angles help the AI. The library button at the bottom left picks photos already on your phone instead. Tap the screen to focus; pinch or use the 0.5 / 1x / 2 buttons to zoom.
The in-hand angle is the one that gives the AI a sense of scale. Set up the hand reference once in Settings and it becomes a real ruler.
-
STEP 3Details: type, size, notes
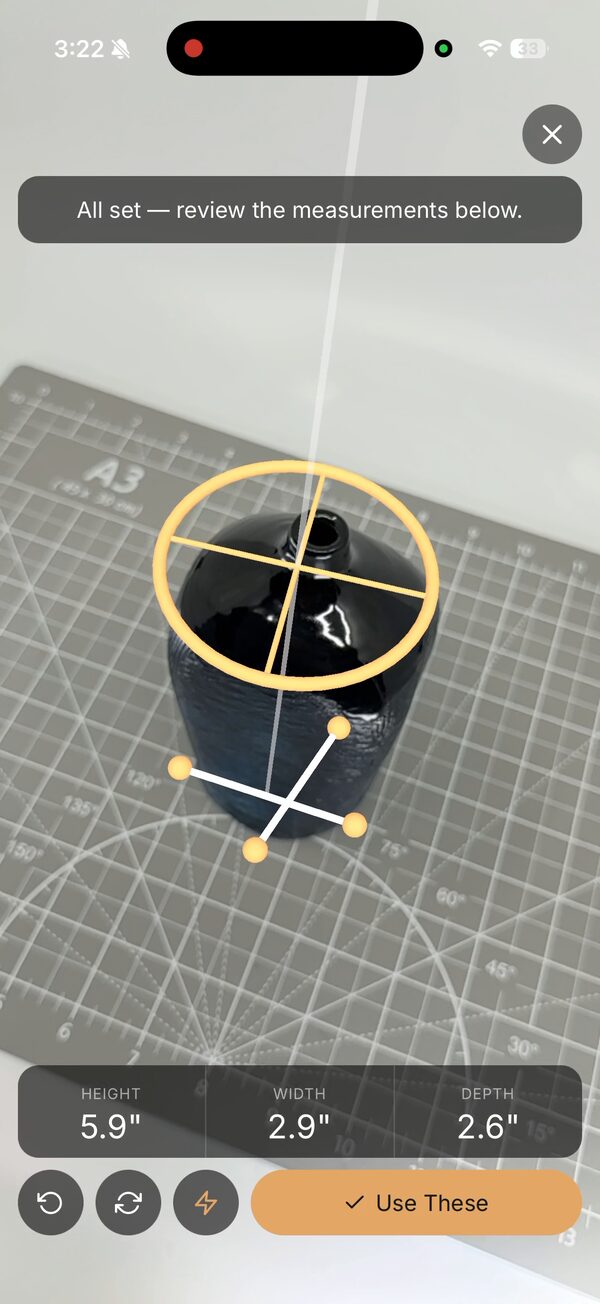
POTTERY TYPE is suggested from the photos — tap another if it guessed wrong. For size, an iPhone Pro offers Measure with LiDAR (point the camera, seat the ring on the rim, tap Use These); other iPhones offer AI Estimate from Photos, which a grid mat or the hand reference makes noticeably more accurate. Or type the numbers. Under NOTES FOR THE LISTING write what only you know — clay body, glaze, whether it is food safe — and the description will quote it as fact. Not ready to measure? Skip for now; you can measure from the piece’s page any time.
-
STEP 4Choose Template, then Generate
Leave Auto-Generate selected (it is marked Recommended) and tap Generate. The AI reads the photos, the size and your notes and drafts the listing. Templates are for later, when one kind of piece needs its own recipe.
-
STEP 5Review and add it to inventory
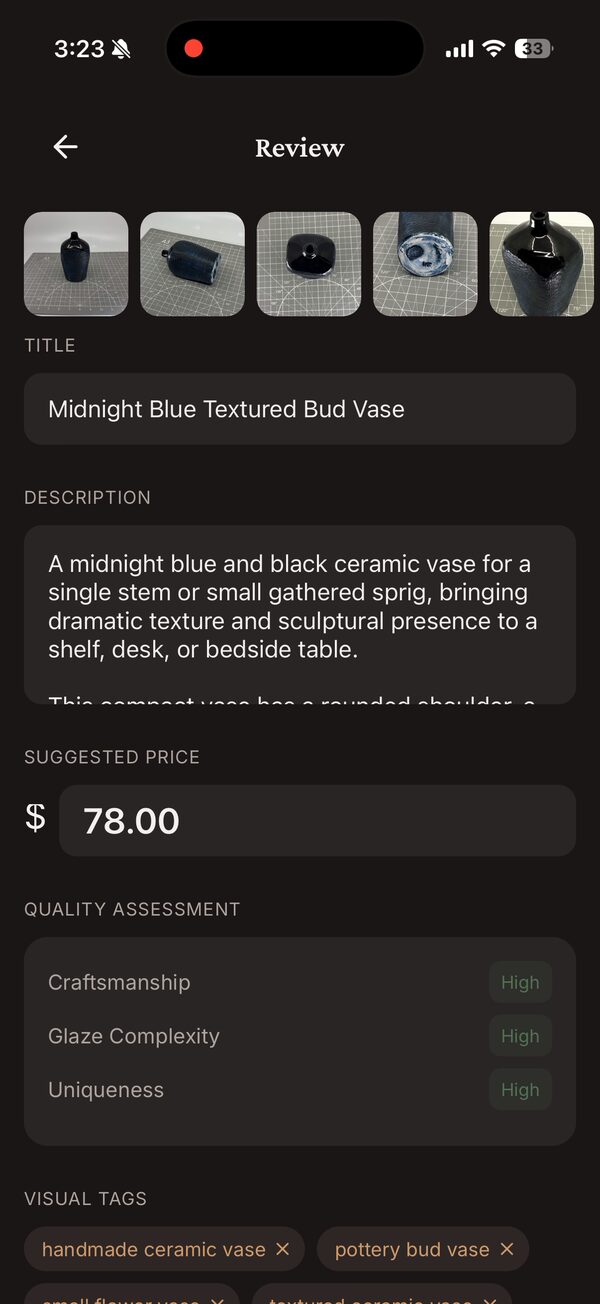
Read the TITLE, DESCRIPTION and SUGGESTED PRICE, glance at the QUALITY ASSESSMENT and the tags, and change anything you like — every field is a text box. Then tap Add to Inventory.
-
STEP 6It is a draft. Now post it.
The piece appears at the top of Inventory as a Draft. Tap it any time to edit, measure again, or regenerate the listing. The next step is the reason the app exists: post it to Etsy, or to Instagram and Facebook.
Good to know
No signal by the kiln?
Capture anyway. The piece saves on the phone marked pending, uploads the next time the app is open with a connection, and the piece page then offers to generate the listing details.
It saved before the AI finished.
The piece page shows a card offering Generate with AI or I’ll fill it in myself. Nothing is lost; the photos are there.
Can I add a piece from photos I took earlier?
Yes — the library button on the capture screen. Everything after that is the same, including the size estimate and the listing.
Anything else?
Email support@kilntocart.com — it reaches a person.